How To Break In A New Axe
Timber Gadgets is reader-supported. We may earn a commission if you buy through the links on our site.
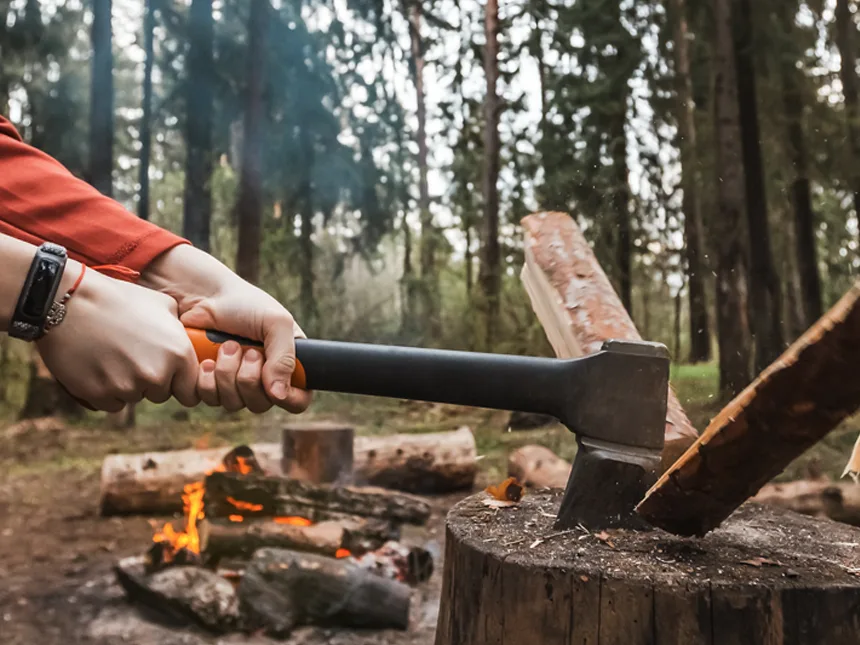
Getting a new axe can be an exciting event. You just opened the package or perhaps you purchased it from a store and now you’re ready to swing your new axe. While you won’t hurt anything in doing so, there are a few things I recommend doing first.
This guide is meant to help you break-in your brand new axe; I’ll give you some pointers on what you can do to get it ready. At the very end of this page, I’ll explain how to store your axe when you’re not going to be using it for a while. These tips are fitting for any type of axe, whether you have a new hatchet or splitting maul, this guide is still helpful.
Table of Contents
Protect the Handle
In this section, I’ll show you two different means of protecting your new (or old) handle. This step is crucial for axes with wooden handles. Composite handles are great, sure, but not much can beat a nice American hickory handle.
When you’re finished reading this post, check out my axe handle guide for more help.
Oil
The very best way to protect wooden handles is by putting a few coats of oil on it. As the oil soaks into the handle, it causes the wood to expand (slightly). This is especially beneficial in the eye of the axe where the wooden handle and head of the axe are held together. A wedge is used to expand the top of the handle which keeps the head from flying off. Oil helps to add even more pressure by causing the wood to expand.
Once the oil polymerizes on the surface of the handle, it protects it from the elements. You should never leave your axe laying outside on the ground but the oil is more than enough to protect the wood while you’re using it.
To know why this step is so important you have to know a little about wood and how it dries. Lumber mostly dries from its ends. And as it dries, moisture leaves the wood and causes it to shrink. When wood shrinks it most often results in cracks. This is why old tools with untreated wooden handles are almost always cracked. It’s because the handle was left to dry out for so long that it ended up shrinking and cracking. This is bad both for your hands and the head of the axe, which is now at risk of being loose from the handle.
Anyway, you get the point; putting oil on the handle is important. So, what type of oil should you use? Well, any type of drying oil. This includes tung, walnut, teak, hemp, linseed oil, and more. A drying oil is anything that hardens on exposure to air. Oils like coconut, almond and olive oil are non-drying oils which means they won’t harden when exposed to air. Because of this, they’re not great options for protecting the wood.
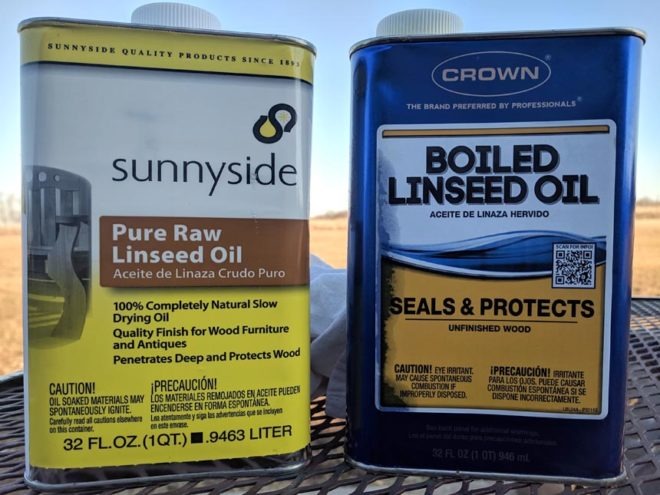
I recommend linseed oil. Now, there is raw linseed oil and boiled linseed oil. Boiled linseed oil takes less time to dry but it also contains “metallics dryers. This has caused concern for some people. On the other hand, raw linseed oil doesn’t contain metallic dryers – it just takes more time to dry. I covered this topic more in-depth on a different page (raw or boiled linseed oil) read more by clicking the link.
Before you apply the oil, it’s important to do a quick inspection of the handle. Use a piece of fine sandpaper to remove any rough spots. Also, did the handle come with a varnish? Some companies seal the handles of their tools with a varnish. Varnish should definitely be removed. Once you’ve sanded off a thin layer of wood, it’s time to apply the oil to the handle. Apply coat after coat, giving the oil enough time to soak in and completely dry on the surface. Gently wipe the handle with a rag before applying a new coat. Do this until you have three or four coats on the handle – more coats is fine, too.
Collar
Adding a “strike collar” to your new axe, especially a splitting maul or splitting axe, is a great way to ensure you don’t scuff-up the handle. Even the most experienced woodsmen miss every now and again; there is no reason to be ashamed of it. It just happens. Having a steel (or leather) collar will help protect the handle from damage.
Now, some high-end splitting mauls come with a steel collar but not all of them. In this case, you’ll need to either fashion one on your own or buy a third party product. I don’t know of any company selling steel strike collars because there is such a large variety of handle sizes it would be near impossible to make one that fits all. Instead, you can purchase leather handle guard (click here to see it on Amazon). This might be more beneficial for hatchets. I don’t advise this for every situation but if you feel your axe (or hatchet) will benefit from a leather handle guard, I’d say go for it.
Sharpen Your New Axe
Unless you buy a premium axe, it probably won’t come with a razor-sharp cutting edge. This part is up to you. Fear not, there are several ways to sharpen your new axe and plenty of “how to” guides and videos on the subject. Sharpening an axe with a file is probably the cheapest option but tools like angle grinders, rollocks, and bench grinders can help you do the job even faster. Unfortunately, grinders can be expensive and not everyone has access to one. A bastard file will get the job done and they’re fairly cheap and easy to store.
You can opt for a “straight edge” or a “rounded bevel edge”. A straight edge is flat and equal on both sides, having an angle between 25° – 30°. A rounded bevel edge is rounded and leaves more support behind the cutting edge; I recommend the rounded bevel edge because of this reason.

Using a Lansky puck (click here to see it on Amazon) is a great way to put the finishing touches on your cutting edge. A Lansky puck is a whetstone in the shape of a puck or disc. Typically, knives are sharpened by moving the cutting edge over the stone (taking the cutting edge to the stone). Since axes are large, it’s easier to move the stone instead of the whole axe (taking the stone to the cutting edge). Another benefit of a Lansky puck is that you can easily take it with you; they’re small and don’t require much room.
Start Using It…
So, if you’ve oiled the handle, sharpened the bit, and fashioned a steel or leather collar, you’ve done just about everything I can think of. All that’s left now is to go use it. After all, what better way to break in a new axe than by using it?
Storing and Protecting the Head
This last tip isn’t so much for preparing a new axe but rather how to protect it when you’re not using it. Especially if you won’t be using it for several months. Water can wreak havoc on tools. The head of the axe is the main part you want to be concerned with; the goal is to keep it from rusting. This means protecting it from water and moisture in general. Rust is an iron oxide that forms when iron or steel is exposed to air and moisture.
Removing rust isn’t a monumental task but you just as well prevent rust, to begin with. To do this, simply coat the head of the axe with oil and store it in a dry location. Nearly any type of oil works for this task but, depending on how long you’re storing the tool, some work better than others. Gun oil, vaseline, or beeswax will suffice for several months of storage. Cosmoline is a long-term storage product once used by the military. Whether you want to go that far or not is entirely your choice but at least consider trying a gun oil or Vaseline.
Anyway, I hope this guide helped you in one way or another. Please consider sharing with family and friends. Also, if you have any tips for breaking in a new axe, please share your tips in the comment section below.